Writing my personal home page
Update
I’m mainly a web developer, yet for quite a while, my personal site looked like this:
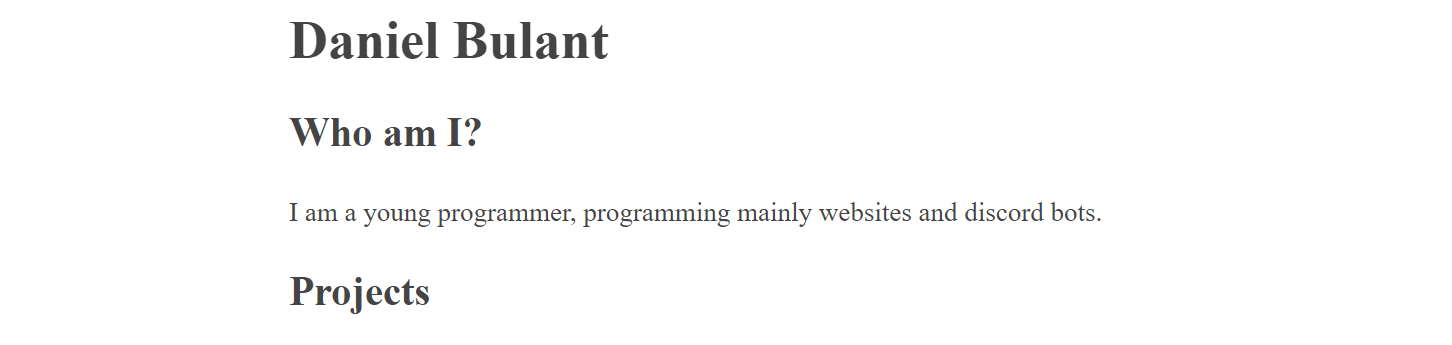
This isn’t really a problem per-se, but if you want to present yourself as an experienced web developer, a page like this probably isn’t enough.
Original idea for this website was a simple minimalistic website with just links to my projects. I then later thought that it might be better for it to be a good portfolio website which I could share as one of my best works by itself, not to mention the content it links to (like my other projects).
Few iterations later (like when I changed the styles to use a bit more modern font, as well as images and dark mode (
Wayback machine
)), I decided I’d ask my friend Carl Hansen for a design (as I’m not really a good designer). He gave me this design free of charge.
Creating a Svelte website
I really like
Svelte
for it’s simplicity, size and performance. Usually, if a framework wins
StackOverflow survey for most loved languages
, it’s not that bad.
I created a new project simply by using
pnpm init svelte@next(side note: I’m using
 pnpm
as it’s a faster alternative to npm which also saves disk space)
pnpm
as it’s a faster alternative to npm which also saves disk space)
Click to view moreThis creates a new
Svelte Kit
project, by first asking for configuration (i.e. if you want typescript, ESLint and/or prettifier) and then initalizing from a template.
Last step to initialize is to simply install the dependencies:
pnpm installI also instantly created
git repository (as is suggested), and uploaded initial commit to a private repository on github. GitHub has unlimited repositories, so I might as well use them for backups (for when I accidentally delete part of a project).
git init # initializes repository
git add -A # adds all files to tracking
git commit -m "Initial commit" # Creates a commit with message "Initial commit"
Adding reactivity
So let’s skip the boring styles (it’s just normal css) and HTML markup. If you want to learn that, I suggest looking at
MDN web docs
. Or you can use inspect on some pages to learn what tricks they use (or, as one can say, what
CSS tricks
they use).
Svelte’s reactivity is really easy. Unlike angular or react, it doesn’t need any boilerplate for adding new modules, just write code directly.
An example component:
<script>
    var name = "world";
</script>

<h1>Hello {name}</h1>
<input type=text bind:value={name}>

<!-- Styles hidden for readability -->
Interactive example
Hello world
As you can see, little code is needed to achieve simple synchronization between text input, variable and title.
The
bind: feels almost like magic. Coming from React’s
onValueChanged={(value) => this.setState({ value })}, I immediately fell in love and stopped using React. Now React feels kind of clunky in comparison to me.
Another part of the
bind: directive is that it’s bi-directional -
input doesn’t have sole ownership of it, and will change it’s contents when
name changes outside of it, like so:
<script>
    var name = "world";
</script>

<input type=text bind:value={name}>
<input type=text bind:value={name}>
Interactive example
Using that, I added a switch between dark mode and light mode.
I personally always prefer dark mode, but I know many people that like light mode more, so I wanted to have both as options.
You can try toggling to light mode using the button on the navigation bar in top right, or using this:
Instead of writing how to use Svelte here, I’d recommend trying their excellent interactive tutorial
here
.
Folder structure
Svelte kit requires some folder structure (which it creates for you, but it’s good to know about regardless).
Essentially:
-
src/libis aliased to$libwhen importing. You can use that instead of needing to use../../../../ -
src/routescontainsjsandsveltefiles (or ifmdsvexis configured, as shown later,mdfiles). Each file corresponds to a URL. Extensions are not used in the requests. See below for more -
staticis for all static files. You can also put these files into routes, but it’s generally good practice to separate them. -
svelte.config.jsis used for configuring svelte kit (will also be used later)
Routes
For full description, see
Svelte Kit’s documentation
Essentially, each folder in
src/routes creates a new route.
All special files in sveltekit start with a
+ -
+page.svelte is the page visible to user
/+page.svelte is the root page
/something/+page.svelte will be accessible as
/something
js files are used to create API endpoints, which are run server side. Those can do some action (like user login/registration), or retrieve some data (like a list of blog posts, as I’ll demonstrate later).
md files are compiled/transpiled into
svelte files internally, and behave nearly identical. Note this only works when you set up mdsvex with sveltekit (sveltekit doesn’t do it on it’s own).
Writing blog posts
After a while (oh wait it’s already a year) I wanted to write some blog posts.
The design from Carl was only a single page, but it did include some list of posts there (see the home page, also reused in the posts page), and I felt confident enough that I could code at least a text-first website without a design.
To more easily write blog posts without writing HTML, I decided to use
Markdown
.
To add more to that, I found
mdsvex
, which allows one to use markdown from svelte, and use svelte from markdown.
Their website only specifies how to use it on classic Svelte (via rollup or webpack), but Svelte Kit hides this configuration (in addition to using vite in dev mode).
But fear not, adding
mdsvex to SvelteKit project is really easy.
Install
mdsvex from npm:
pnpm i mdsvexAnd update
svelte.config.js - in the
config part (not inside
kit), add
extensions: [".svelte", ".md"] (this makes Sveltekit accept markdown files as their own routes) as well as
preprocess: [mdsvex()].
The final version may look something like this (when
static adapter is in use):
import adapter from '@sveltejs/adapter-static';
import { mdsvex } from 'mdsvex';

/** @type {import('@sveltejs/kit').Config} */
const config = {
	kit: {
		adapter: adapter({
			precompress: true // Recommended for static sites as it precompresses the files so that browsers need to download less content
		})
	},
	extensions: ['.svelte', '.md'],

	preprocess: [
		mdsvex({
			extensions: ['.md']
		})
	]
};

export default config;
This will allow you to create routes with
.md as their extension, which will be preprocessed by
mdsvex.
One can then easily write blog posts in markdown, as well as include svelte components (you can view the source code for this blog post
here
).
I recommend disabling
smartypants option for
mdsvex, or at least the
quotes part (i.e.
smartypants: { quotes: false } in
mdsvex({...})), as it breaks Svelte templates (for example when you try to use
{something ? "opt1" : "opt2"}, it will use “clever quotes”, which are not valid JS).
Last thing to do, is if you want to have code highlight, you have to include one of Prism themes.
I recommend simply copy pasting one of the CSS files
here
and including that in
app.html.
Gotchas
mdsvex has a few gotchas.
As mentioned before, using strings may not always work correctly with
smartypants option.
Using any preprocessor (typescript or scss) won’t work in markdown files. Make them a separate components and import them.
Markdown files won’t receive loaded props, but
_layout will, so you can go around that using layouts.
Frontmatter
Frontmatter is a simple way to store metadata in markdown. Usually specified by 3 dashes (
---) must be present at the start of the file (frontmatter itself isn’t required to be, but if you want to use it later, you need the frontmatter to be at the start of the file).
---
title: An example blog post
date: 2020-03-05
---

Hello there, **markdown**
You can then write YAML metadata (YAML is basically simplified JSON. If you’re unsure, any JSON is valid YAML, so you can write it in JSON as well). For example, this page stores it’s title, description and thumbnail links there.
When you import the file elsewhere, you can use that metadata to for example show a preview of the post (as is the case here).
A simple API route can be used to get a list of posts along with their metadata, for example if all the posts are in
/posts route, you can use this as
/api/posts.json/+server.js:
export async function GET() {
    const allPostFiles = import.meta.glob('../../posts/**/*.md');

    const allPosts = await Promise.all(
        Object.entries(allPostFiles).map(async ([path, resolver]) => {
            const { metadata } = await resolver();
            let postPath = path.slice(2, -3);
            if(postPath.endsWith('/+page')) postPath = postPath.slice(0, -6);
            return {
                ...metadata,
                path: postPath,
            };
        })
    );

    allPosts.sort((a, b) => {
        return new Date(b.date) - new Date(a.date)
    });

    return new Response(JSON.stringify(allPosts.filter(t => new Date(t.date) < Date.now())), {
        headers: {
            'Content-Type': 'application/json'
        }
    });
}
this will get all the metadata about posts and return it as a JSON response, ordered by the
date property in frontmatter (this also expects that all posts have a
date property). Those files are also called
endpoints
in Svelte Kit’s terminology.
GET /api/posts.json
(link will take you to the
posts.json file here)
[{
    "title": "An example blog post",
    "date": "2020-03-05",
    "path": "/posts/example"
}]
You can then use
SvelteKit’s
load and
fetch features
to get the list of blog posts and display it.
SSR
First iteration of this new design wasn’t actually Svelte Kit, but only “plain” Svelte. Those of you coming from the React world, Svelte Kit is similar to Next.js while Svelte itself is the same as React.
This meant that the page was only client side, and the server only pre-compiled JS and sent only minimal HTML markup (which mostly just linked JS which did everything else). This meant the page didn’t work without JS and took a bit to load.
To fix that, I later moved it into Svelte Kit page (Svelte does support SSR, but it’s easier to use Svelte Kit) and used the
static adapter which meant that all the pages are now prerendered and work without JS. This also means it’s fast to load (especially when using CDN, such as
Cloudflare
, which this website does use. Not affiliated with them).
If you use the
adapter-auto, deploying to Cloudflare pages should work nearly as is, you just need to set
NODE_VERSION environment variable to
14 or
16, as it’s by default set to
12 which is too old for Svelte kit to work.
Wrapping up
Thanks for reading, hope you learnt something new - as I did when I wrote this blog post, after spending an hour to update this site with new styles and functionality.